If you’re unfamiliar with the Micro:bit, it is a small and affordable microcontroller designed by the BBC for use in teaching computer science. I highly encourage you to read more about it. You can try coding it online using their online editor and Micro:bit simulator.
Below is a video of the Micro:bit programmed with Scratch on a Windows laptop. In this post we will go over the steps necessary to set this up. In the next post we will go over the Scratch code.
I just love how the #microbit can make a simple #scratch game more interactive and fun! In this example, I created a large paper pencil that is covering the microbit, which is controlling a spelling game. @microbit_edu @scratch pic.twitter.com/g14YbXq60B
— Yoko Obata (@koko_teach) July 24, 2018
List of parts:
- Micro:bit kit
- Windows PC
- Construction paper
- Color pencils
Software List:
Setting Up Your Coding Environment:
On the Micro:bit website, they list a few ways to work with Scratch. We will use the Micro:bit bridge developed by MrYslab. Comprehensive documentation and an easy to follow guide is provided by the developer here https://mryslab.github.io/s2m/ . We will work through the setup process.
- Install Scratch 2 Offline Editor
- If you already have Scratch installed, make sure it is updated.
- Install Python
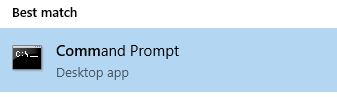
- To check if you have Python installed already open a command window by hitting the Windows key then typing ‘command’
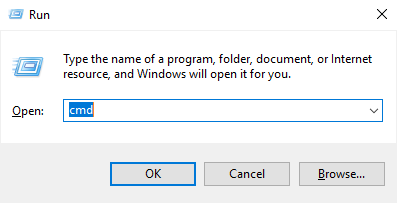
- Or use the shortcut ‘Windows Key + R’ to bring up run, type in ‘cmd’ and hit enter
- The guide states it will work with either Python 2 or Python 3. Download and install Python 3. If you plan on learning Python in the future you should learn Python 3
- Don’t worry, you do not need to know how to code in Python, MrYslab provides you with the code you need
- Install the mu Editor
- This is a free and simple Python editor
- This is where we will paste MrYslab’s Python code
- This program will also allow us to flash (load) the Python code onto the Micro:bit
- Install the s2m Micro:bit Script onto the Micro:bit
- All we’re doing here is copy and pasting the code provided into the mu Editor, then flashing the code onto the Micro:bit
- At this point you should have Scratch offline editor installed, Python 3 installed, and the Micro:bit plugged in
- Follow the steps to flash the Python code onto the Micro:bit
- Install s2m
- All we’re doing here is adding the s2m module to our Python library. Fortunately this is very easy and it only requires a single command
- Open up the command window and type pip install s2m
- Hit enter to begin the installation process
- See step 2 on how to open a command window
- Start Using s2m
- At this point you should have Scratch offline editor installed, Python 3 installed, mu editor installed, flashed the Python code onto the Micro:bit, ran the ‘pip install s2m‘ command, and have your Micro:bit connected
- If you already have the Scratch offline editor installed, run it to see if an update is required. If so, go ahead and update Scratch. When you are done updating Scratch close it.
- MAKE SURE YOU ARE USING SCRATCH 2
- MAKE SURE SCRATCH OFFLINE EDITOR IS CLOSED
- MAKE SURE THE MICRO:BIT IS PLUGGED IN VIA USB TO YOUR PC, YELLOW LIGHT ON INDICATES IT IS PLUGGED IN
- Open a command window and run the command ‘s2m’
- If you see the following error:

- Make sure you flashed the Python code onto the Micro:bit (see Step 4)
- Make sure the Micro:bit is plugged in via USB
- Scratch should open up and under ‘More Blocks’ you’ll see the Micro:bit blocks.
- Make sure to SAVE your scripts before shutting down.
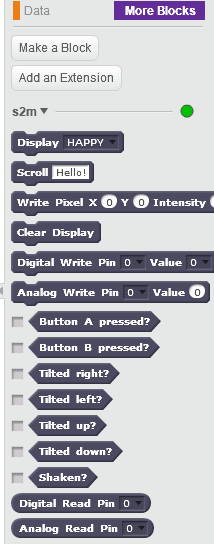
MrYSlab provides documentation for all the Micro:bit Scratch blocks provided. I recommend you take a look and familiarize yourself with the blocks.
Programming the Controller:
Before we finish Part 1 and move onto Part 2, let’s test the Micro:bit and Scratch. Let’s program the Scratch cat to move up and down based on the Micro:bit’s tilt.
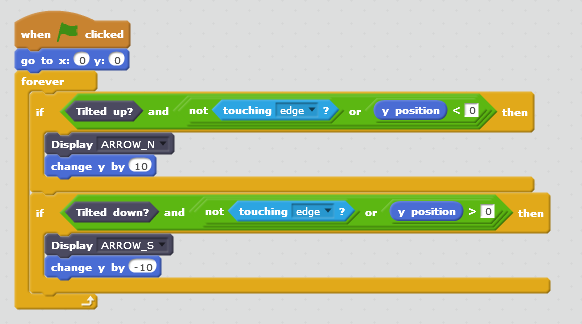
- Try the following code on an empty Scratch project running s2m. It should move your cat up and down depending on the Micro:bit tilt, and the cat should stop at the top or bottom edges.
- Let’s examine the code
- To move up, the following must be true: (Tilted Up) AND (NOT touching the edge OR y-position is negative). Let’s break this down.
- The AND means both conditions to the left and right of it must be true. (TRUE) AND (TRUE)
- The OR inside the parenthesis means either condition must be true. So the following will yield true:
- (TRUE OR FALSE) (FALSE OR TRUE) (TRUE OR TRUE)
- Therefore, the following combinations will make our condition TRUE and move our sprite up:
- (TRUE) AND (TRUE OR FALSE)
- (TRUE) AND (FALSE OR TRUE)
- (TRUE) AND (TRUE OR TRUE)
- Micro:bit tilted up (MUST ALWAYS BE TRUE)
- When we tilt up, this will be TRUE
- Otherwise, this will be FALSE (tilted down or no tilt)
- Sprite is NOT touching the edge (edge being the top or bottom of the screen since we’re moving up and down)
- If we’re NOT touching the edge this will be TRUE
- If we are touching the edge this will be FALSE
- Sprite’s y-position is negative
- We use this to distinguish the sprite touching the bottom versus the top edge
- If we’re not touching the edge, our position does not matter since the OR will yield true
- (TRUE OR FALSE/TRUE) gives us TRUE
- If we’re touching the bottom edge (which would also mean our y-position negative), we still want to allow our sprite to move up
- (FALSE OR TRUE) gives us TRUE
- If we’re touching the top edge (which would mean our y-position is positive), we don’t want our sprite to move up
- (FALSE OR FALSE) gives us FALSE
- To move down, the following must be true: (Tilted Down) AND (NOT touching the edge OR y-position is positive):
- Micro:bit tilted down (MUST ALWAYS BE TRUE)
- Sprite is NOT touching the edge
- Sprite’s y-position is positive
- Again, used to distinguish the Sprite touching the top edge versus the bottom edge
- This condition is similar to tilting up, but we’re checking our moving down conditions
In the next post, we’ll go over the code for the game and mechanics behind it.
Leave a Reply